Josetta getting started guide
Josetta has been discontinued as of January 20, 2017. It is not developed any longer, and unsupported. This documentation is left available as a reference for past users.
First, be sure you have read this overview and understand the principles upon which Josetta operates.
Reminder: Your Joomla! site must be configured as a multilingual site before Josetta can be of any use. We recommend having a fully configured multilingual site before installing Josetta.
1 - Prepare your site for multilingual operation
Configuring Joomla! to operate as a multilingual site requires a few steps such as installing wanted languages, and configuring some standard menu items. We've compiled below a quick list of tutorials showing how to do this:
If you install an entirely new site, the Joomla! installer directly offers to add additional languages and create per language categories and menus. This way, you'll get a fully configured site in seconds.
2 - Install Josetta
Please see the installation page for that. After installation has completed, you'll notice new elements on your site:
- a
Josettauser group, with multiple sub-groups, one per content language on your site - a
Josettafront end menu, with aJosetta translation managermenu item - a
Josettaaccess level
3 - Give translators permission to translate
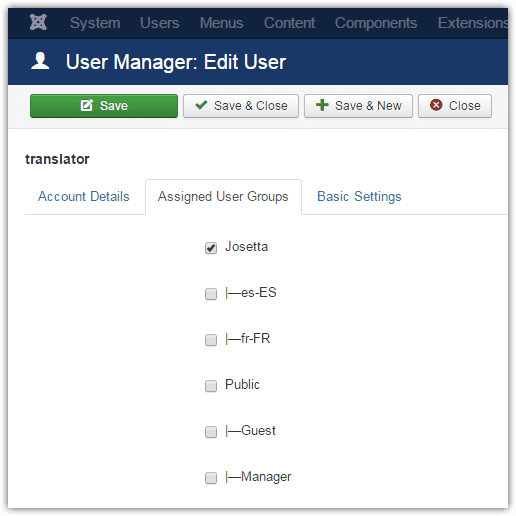
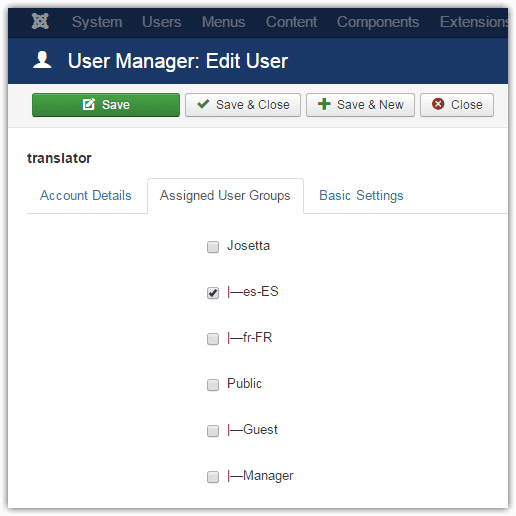
Access to translating content through Josetta is granted to logged-in users who belong to either the Josetta group or one of the per-language sub-groups.
So before translating can start, either by yourself or by other translators, you should:
- create a user account per translator (you can use existing accounts, not need to create new ones specially for Josetta use)
- add users either to the
Josettagroup, or to one ore more of the sub-groups:

This above user has been added to the Josetta group, in order to translate any language. The user below, being assigned to the es-ES group, will only be presented with Spanish translations options.

Add users to the Josetta group or sub-groups in addition to their current group(s). They don't need to have specific accounts for the Josetta-translation work they do.
If some language groups are missing:
Josetta will automatically create per-language sub-groups upon installation. However, if you install more languages after Josetta has been installed, those languages won't have any Josetta sub-group. You should therefore add them yourself, using the Joomla! Groups manager, under Users > Groups. Add one group per language. Use the language 4-letters code as the group title and make sure the group parent is the Josetta group.
4 - Done: go translate!
You or your translators can do that either on the front end or back end.